 Reviews


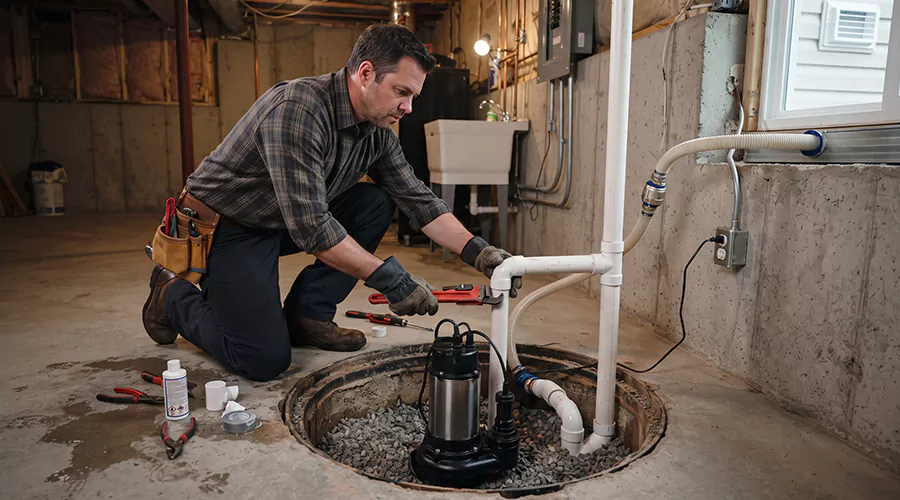
A DIY sump pump installation costs $150 to $400 total against $1,500 to $3,500 for a professionally installed new system. The gap exists because the pro price buys concrete cutting, and the machine itself is the easy part.
Putting in a sump pump takes one weekend for a first-timer with a rented jackhammer. A swap into an existing pit takes one hour.
Two small details decide whether the finished system works: a check valve pointed the right way and a weep hole most guides forget. Both get their own steps below.
Plan the Sump Pump Setup
- A complete sump pump setup has four parts: The pit, the pump, the discharge line and a dedicated outlet. Location decides performance before any part is purchased. Installing a sump pump in the basement starts with finding the slab's lowest point, since water finds it first.
- Placement has rules: Keep the pit at least 8 inches away from foundation walls, and call 811 to locate underground utilities before breaking ground. Beyond code, putting a sump pump in basement corners with the shortest run to an exterior wall saves pipe and pumping lift.
- Paperwork comes before the jackhammer too: Many municipalities require a permit for the electrical or plumbing work, and discharging sump water into the sanitary sewer is almost universally prohibited.
The name describes the whole design, since a sump and pump system is simply a lined hole plus a machine that empties it.
Insider tip: Run a hose on the basement floor for one minute and watch where the water travels. The slab just told you where the pit belongs.
Sump Pit Installation
Sump pit installation is the concrete half of the job and the reason pros charge four figures. The pit gets cut, dug, lined and graveled before any pump appears. Budget most of your first day here.
- Mark and cut: Outline the basin on the floor with a 3 to 6-inch buffer for gravel, then break through the concrete with the jackhammer.
- Dig deep enough: Excavate so the basin rim ends up flush with the floor. A pit that ends up too deep gets gravel added until the rim sits level.
- Perforate and wrap: Drill quarter-inch holes in the liner's upper third if it isn't pre-perforated, and wrap the exterior with landscape fabric to keep silt out.
- Build the base: Add two to three inches of gravel and top it with a paver for a sturdy platform.
- Set and backfill: Place the basin, check that it's level and backfill around it with gravel tamped firm.
Proper sump pump pit installation leaves the rim flush and the basin immovable. Finish by pouring concrete over the gravel gap around the basin once testing passes.
Insider tip: Leave the concrete patch for last. An unpoured rim lets you pull the basin back out if the test reveals a problem.
Basement Sump Pump Installation Step by Step
Basement sump pump installation from this point is assembly rather than construction. The pump drops in, the pipe goes up and the float gets room to swim. The hardest part of installing sump pump systems is behind you once the pit exists.
- Set the pump on the paver: The power cord unplugged.
- Check the float: The float switch needs enough clearance to move freely without hitting the basin walls, so run it up and down by hand and confirm nothing obstructs it.
- Attach the discharge adapter: Connect 1.5-inch PVC to the pump's discharge outlet. Snug the fitting without cranking, since overtightening cracks the port.
- Tie the cord to the pipe: Wire ties keep the cord clear of the float's travel path.
Insider tip: Buy a pump with a vertical float rather than a tethered one for narrow basins. Tethered floats need swing room that small pits can't spare.
Sump Pump Plumbing and the Check Valve
Sump pump plumbing runs from the pump to daylight in three parts: the vertical riser, the check valve and the exit run. Two of the smallest components in the system live here, and both prevent the two classic failure modes.
- The weep hole beats air lock: Drill a 3/16-inch hole in the discharge pipe between the pump and the check valve, angled downward. Air-locked pumps push air instead of water while the basement floods, and this tiny relief hole prevents it. A thin stream spraying back into the pit during operation is normal and necessary.
- The valve beats backflow: Sump pump check valve installation goes on the vertical riser with the arrow pointing away from the pump, so ejected water can't fall back and restart the cycle.
- Finish the run outside: Route the pipe through the rim joist, seal the exit with expanding foam and plug into a dedicated GFCI outlet with no extension cords. End the discharge 10 to 20 feet from the foundation.
Insider tip: Add a union fitting just above the check valve. The next pump swap becomes a two-minute twist instead of a hacksaw session.
Pairing a French Drain and Sump Pump
A french drain and sump pump work as intake and outlet of a single system. The drain collects water along the walls while the pit gives it somewhere to go. Neither performs fully without the other in a chronically wet basement.
- The pairing solves the coverage problem: A pit alone drains only its corner of the slab, but perforated pipe in a gravel trench around the perimeter feeds the whole floor's water to that one pit. The french drain sump pump combination is the standard prescription for seepage that appears along multiple walls.
- Scale the outlet to the intake: A basement sump pump system fed by full perimeter drainage needs a half-horsepower pump and a wider basin, since the drain delivers water faster than natural seepage ever would.
Crawl Space and Outdoor Installs
The same system shrinks or moves outside with a few adjustments. Digging replaces jackhammering in dirt-floored spaces, and weatherproofing replaces nothing outdoors. The core steps never change.
To install sump pump in crawl space conditions, downsize everything and prepare to work flat. Crawl spaces run just one to three feet high, so the digging happens by hand. A crawl space sump pump sits in a shallower basin beneath the vapor barrier and shares the same float, valve and discharge logic.
Outdoor sump pump installation catches yard water in a buried basin at the lawn's low spot, with a solids-handling pump and a wet-rated GFCI circuit. Exterior sump pump installation beside the foundation goes one step further by intercepting groundwater before it ever touches the basement wall. Both need their discharge lines drained before the first freeze.
Insider tip: In a crawl space, mount the outlet and check valve before crawling in. Every fitting you assemble in daylight is one you won't fight on your back.
What Installation Costs in 2026?
Sump pump installation prices on one question: does the pit exist yet? Concrete work separates the cheap column from the expensive one. The table shows the realistic 2026 spread.
| Scenario | 2026 cost |
|---|---|
| DIY swap in existing pit | $150 to $400 |
| Pro swap in existing pit | $650 to $1,200 |
| DIY new install with rental tools | $400 to $800 |
| Pro new system with concrete cutting | $1,500 to $3,500 |
| Battery backup add-on | Several hundred dollars |
The insurance math stays lopsided. Water damage to a finished basement runs $10,000 to $30,000 or more, which makes even the top row of professional pricing cheap.
When to Call a Professional?
Call a pro when water, wiring or concrete conditions turn hostile. Four scenarios take the project out of DIY territory regardless of your skill with the dry version.
- Standing water already covers the floor, which makes the room a live electrical hazard.
- No suitable outlet exists, since a new dedicated GFCI circuit is electrician work.
- The slab hides radiant heat lines or post-tension cables.
- The discharge plumbing needs solvent-cemented PVC joints you're not equipped to make.
A pro visit also settles sizing. Matching pump horsepower to inflow and lift height is a ten-minute calculation for someone who does it daily.
Test It Before the Storm Does
The install ends with a flood you control. Pour five gallons of water into the pit and watch the full cycle: float rises, pump starts, water exits outside and the check valve thuds once at shutoff. Inspect every connection for leaks before placing the lid.
Repeat the pour test every three months. A screen over the pit keeps debris out of the impeller, and an annual professional checkup verifies the float and discharge.
Conclusion
The pit is construction and everything after it is assembly. A level basin, a correctly aimed check valve and one small weep hole make the difference between a system and a decoration. Live water and new circuits belong with licensed pros. This week, price a basin and check valve at the hardware store, and the whole project stops feeling theoretical.